
This Airport Guide sets out what Philippine passport holders can expect to encounter when returning home through Ninoy Aquino International Airport’s Terminal 3.
Post last updated from first- or second-hand experience : 20 Apr 2025 (based on a 30 Mar 2025 arrival)
Post last updated/reviewed using other information : 20 Apr 2025
NOTE: This article offers general guidance and is not intended to be a definitive resource. The facilities and procedures discussed here are subject to change without prior notice.
In this post, we’ll explore the international arrivals process at Terminal 3 (T3) of Ninoy Aquino International Airport (common abbreviation: “NAIA” / IATA code: MNL) – the main airport serving Greater Manila in the Philippines.
For domestic arrivals, click here.
If you’re departing from Terminal 3, navigate to the Airport Guides I’ve written covering departures landside (before outbound border control) and departures airside (after outbound border control).
For a broader overview of Terminal 3, click here.
To learn more about the airport as a whole, click here.
CONTENTS
- Intended audience
- Before you fly: Entry requirements and pre-flight preparations
- Step 1: Enjoy the view as you land
- Step 2: Disembark from the plane
- Step 3: Quarantine inspection
- Step 4: Immigration
- Step 5: Baggage reclaim and Customs
- Step 6: Leaving the terminal
- Appendix: Pandemic-related measures
INTENDED AUDIENCE
This guide was written from the perspective of, and primarily for, travellers who hold Philippine passports.
Foreign nationals, unaccompanied minors, and other travellers with special conditions are subject to more complex arrival requirements which I am unable to advise on out of first-hand experience. Having said that, much of the information set out below – such as the layout of MNL’s arrivals area and the general flow of entry procedures – will be of interest to all passengers regardless of circumstances.
BEFORE YOU FLY: ENTRY REQUIREMENTS AND PRE-FLIGHT PREPARATIONS
Please bear in mind that no visa-related advice is offered in this guide. Contact the Philippine Embassy or Consulate in your country and/or the relevant government agencies – such as the Bureau of Immigration and the Bureau of Quarantine – if you require information other than what’s presented below.
Quarantine-related entry requirements
In 2023, the Philippine government scrapped all remaining pandemic-era testing and vaccination requirements.
Electronic Travel Declaration (eTravel)
All arriving passengers must register their personal and travel information on the Philippine government’s Electronic Travel Declaration (eTravel) website. The information collected here covers both immigration and customs, although only customs officials will directly scan your system-generated QR code at arrival. (Immigration officials have direct access to your registered data on their terminals and do not require a QR code.)
Registration is free of charge and requires no app to be installed. Note that you can only log your details within 72 hours before arrival.
WARNING: There are reports of fraudulent/misleading websites that charge fees for eTravel registrations. Ignore them – the eTravel service is completely free of charge. Make sure that the website address you are using is https://etravel.gov.ph/, which can be counter-checked against the links provided in official sources.

STEP 1: ENJOY THE VIEW AS YOU LAND
STEP 2: DISEMBARK FROM THE PLANE
From the aerobridge pier, enter the hallway and follow the signs saying “Arrivals” and “Transfers”.

You may need to cover a fair bit of distance, especially if your plane docks at one of T3’s more remote gates. (This is often the case for smaller aircraft operated by budget carriers.) The corridor is fitted with a few moving walkways to help speed the transit, but they don’t serve its full length.
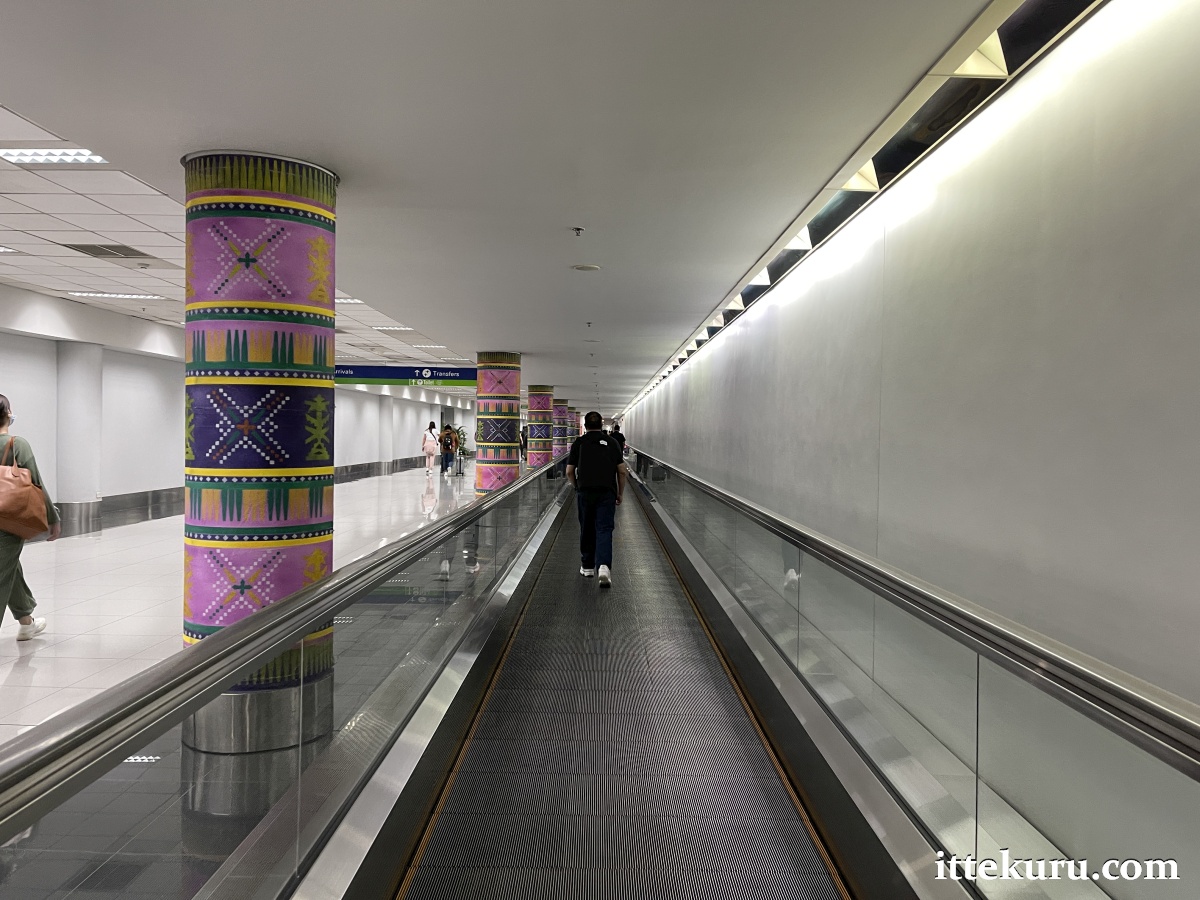
Toilets are available along the arrivals corridor. In addition, if you’re walking from one of the gates in the southern half of T3 – which includes most of the gates used by international flights – you’ll pass a small duty free shop near the very end of the hallway (just before the immigration counters).
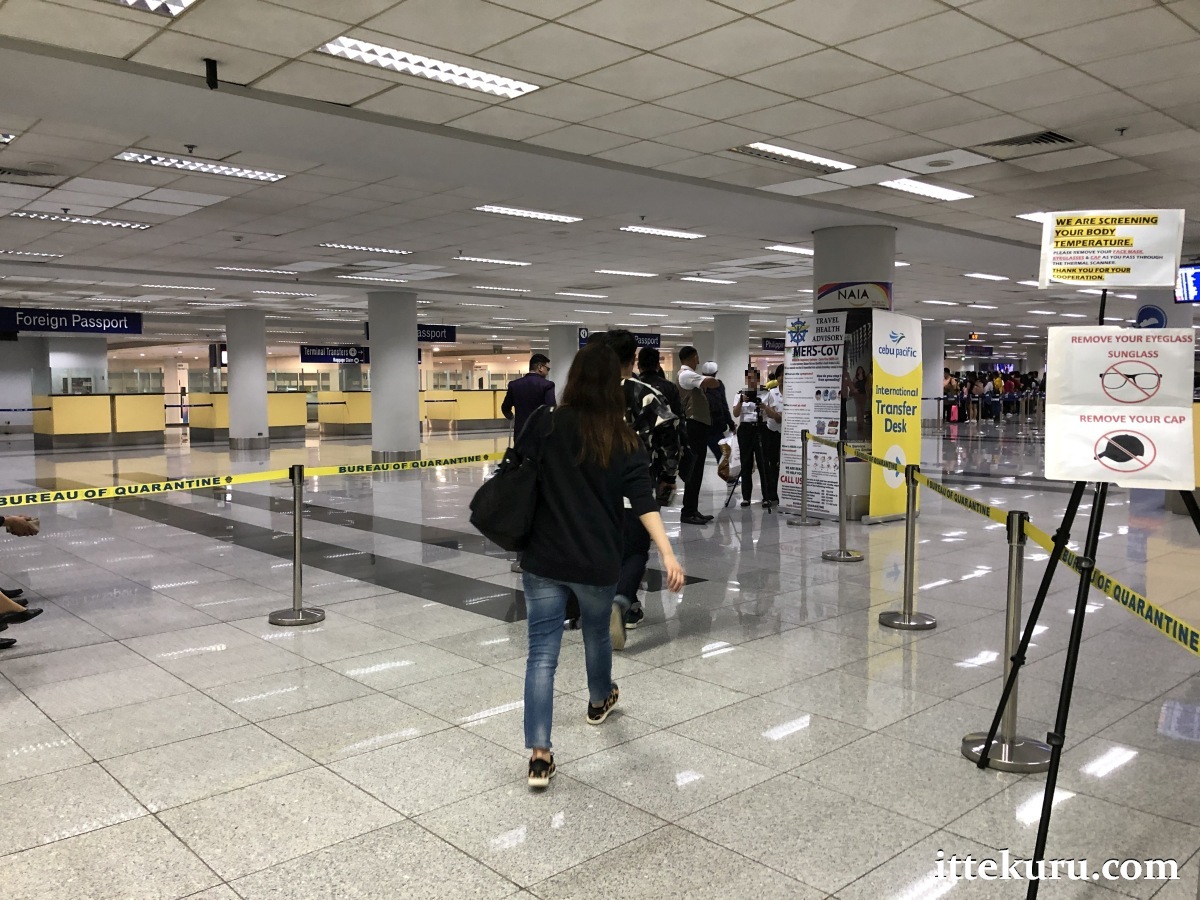
STEP 3: QUARANTINE INSPECTION
Approaching the end of the corridor, you’ll observe a manned counter fitted with a thermal camera. This is meant to rapidly screen the temperature of all passengers walking past.
STEP 4: IMMIGRATION
Separate counters are used for Filipino citizens and foreign nationals. When using a manned counter, simply present your passport to the immigration officer for inspection and stamping. (Keep your boarding pass close to hand in case it’s asked for.) Absent any special circumstances, the whole process will take mere minutes.
By default, holders of Philippine passports are directed to a bank of automated e-gates in the middle of the immigration hall. The following video (not by me!) explains how to use an e-gate to pass through border control.
As of 2024, the e-gates no longer issue arrival stickers for affixing to passports. Just walk straight through once the gates on the other side swing open.
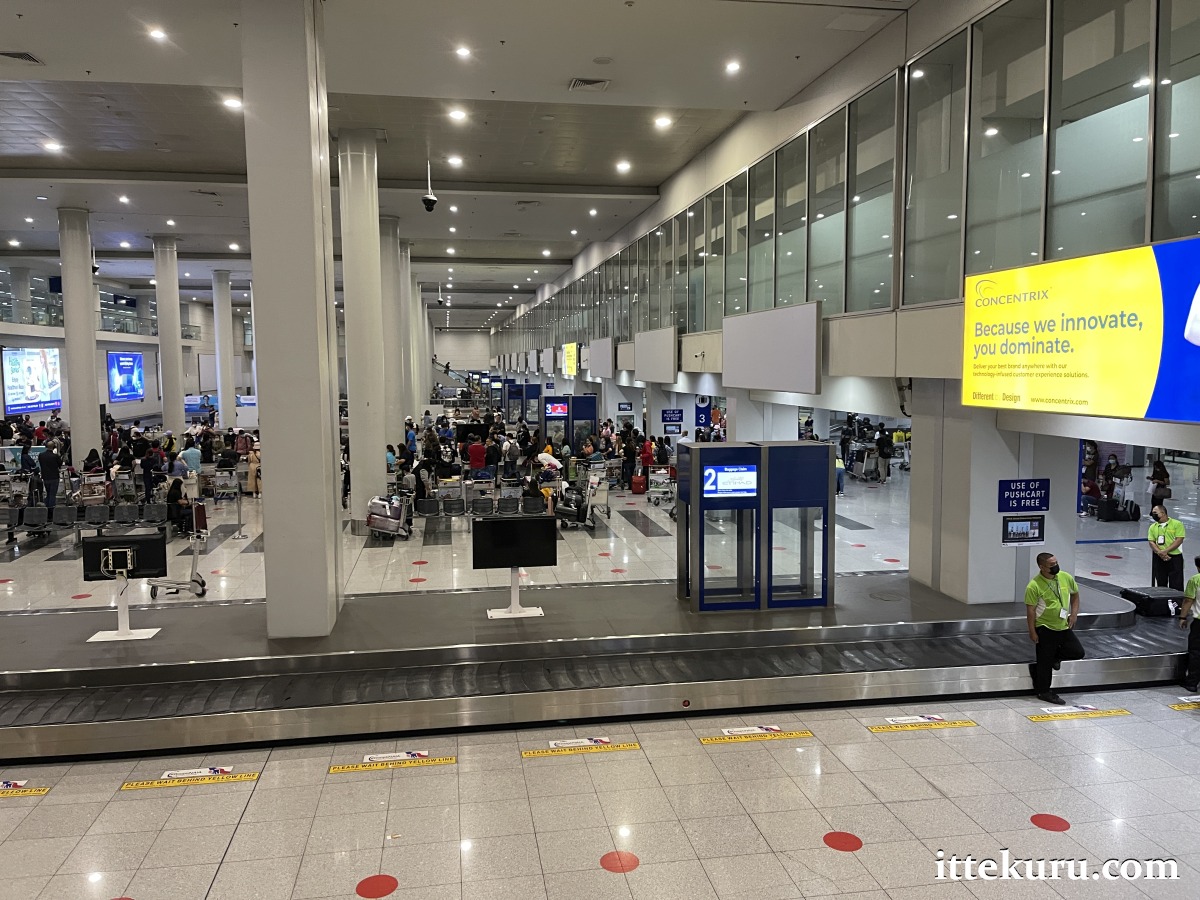
STEP 5: BAGGAGE RECLAIM AND CUSTOMS
From border control, take an escalator down to T3’s baggage hall.

There are times when a flight’s assigned carousel isn’t immediately displayed on the screens in the baggage hall. Enquire with airport staff if this happens and they’ll direct you to the correct one.
As at other airports, there are separate customs lanes for passengers with or without anything to declare (red and green, respectively). This segregation is not always enforced and passengers are often funnelled through a single lane.
Bear in mind that all baggage is subject to inspection at the customs officers’ discretion, even if you pass through a green lane. This may involve an x-ray check and/or a hand search with follow-up questions as needed.
Have your eTravel QR code ready for scanning at the customs barrier – this takes the place of the paper cards that were previously used.
STEP 6: LEAVING THE TERMINAL
Beyond the customs barrier is T3’s arrivals hall. Open to non-passengers, this area is usually one of the most heavily crowded parts of the terminal.
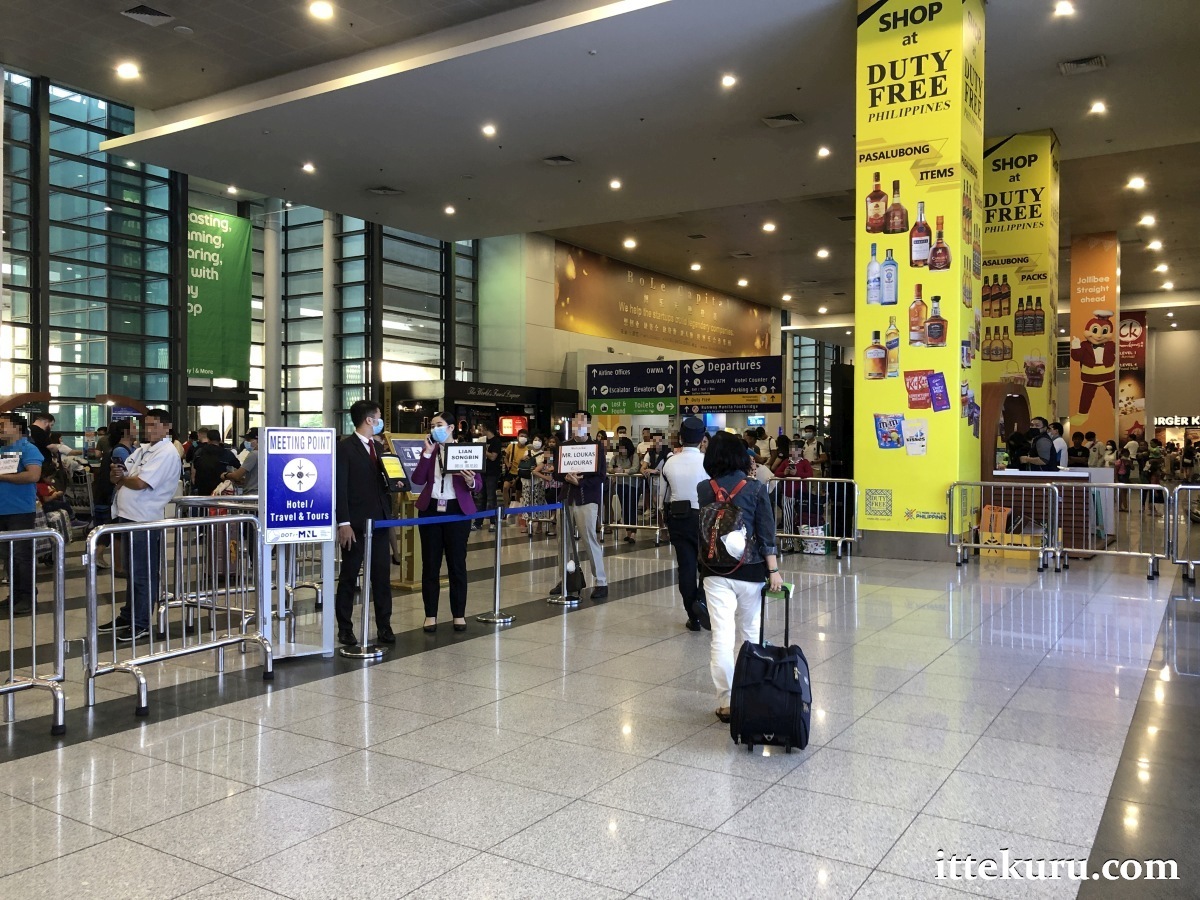
Unless you’ve arranged to meet someone in this hall, you’ll want to plough through the masses and walk straight out onto the pavement.
As shown in the following image, the pavement running alongside T3’s arrivals access road is divided into numbered “bays”. If you’ve asked someone to collect you from the terminal, it’s a good idea to agree on a specific bay number to make it easier for them to locate you.

This is also where you can find and arrange road transport to your next destination. Private vehicles – as well as cars summoned via ride-hailing apps – normally use the road closer to the building whilst public transport flows through the parallel road opposite, stopping along the centre island.
Note that the locations of specific queueing points and taxi ranks do change from time to time. When asking airport personnel for guidance, do so with caution as this could attract the interest of unauthorised touts within earshot (or staff surreptitiously working with them). My preferred method is to ignore all offers of assistance and walk with purpose along the pavement as if I knew precisely where I needed to go, whilst discreetly scanning the scene until I identify the taxi rank or queueing point for the service I require.
The road-based options for travelling onwards from MNL T3 to other parts of Greater Manila (and beyond) are outlined in my separate airport transportation guide.
APPENDIX: PANDEMIC-RELATED MEASURES
In 2023, the Philippine government scrapped its last remaining pandemic-era emergency directives. Public transport operates at full capacity and disease-control protocols – including mask wearing and social distancing – are no longer enforced.
Be aware that some establishments (such as healthcare facilities) might impose stricter requirements within their own premises and ask visitors to put on a mask before entering.
Like what you’re reading? Buy me a coffee!


hi, for how long did the entire process (from disembarking to getting your luggage) take? thank you
I’m afraid I can’t recall how long I waited for my bag once I reached the luggage belt. That said, the whole interval from stepping out of the aeroplane to reaching the baggage hall – with quarantine and immigration in between – was only about 10 minutes all told. Didn’t take long at all, though I should mention that (a) I had my One Health Pass all sorted so it was just a quick scan-check at the quarantine barrier, and (b) there was practically no queue to speak of at the immigration counters for Philippine passport holders so I was served almost instantly. Conditions might differ if you happen to arrive at a particularly busy time.
Cheers.
Thank you.
Your blog is very informative and helpful.
Hello. Do you you know which page we should affix the sticker on?
Hi Can you access the BI One Stop T3 when you have a domestic departure .